Filed under: Making-of, Photorealism.
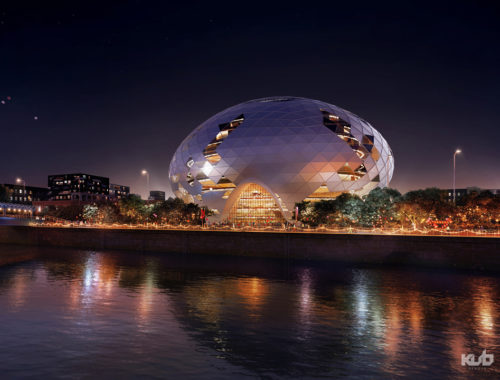
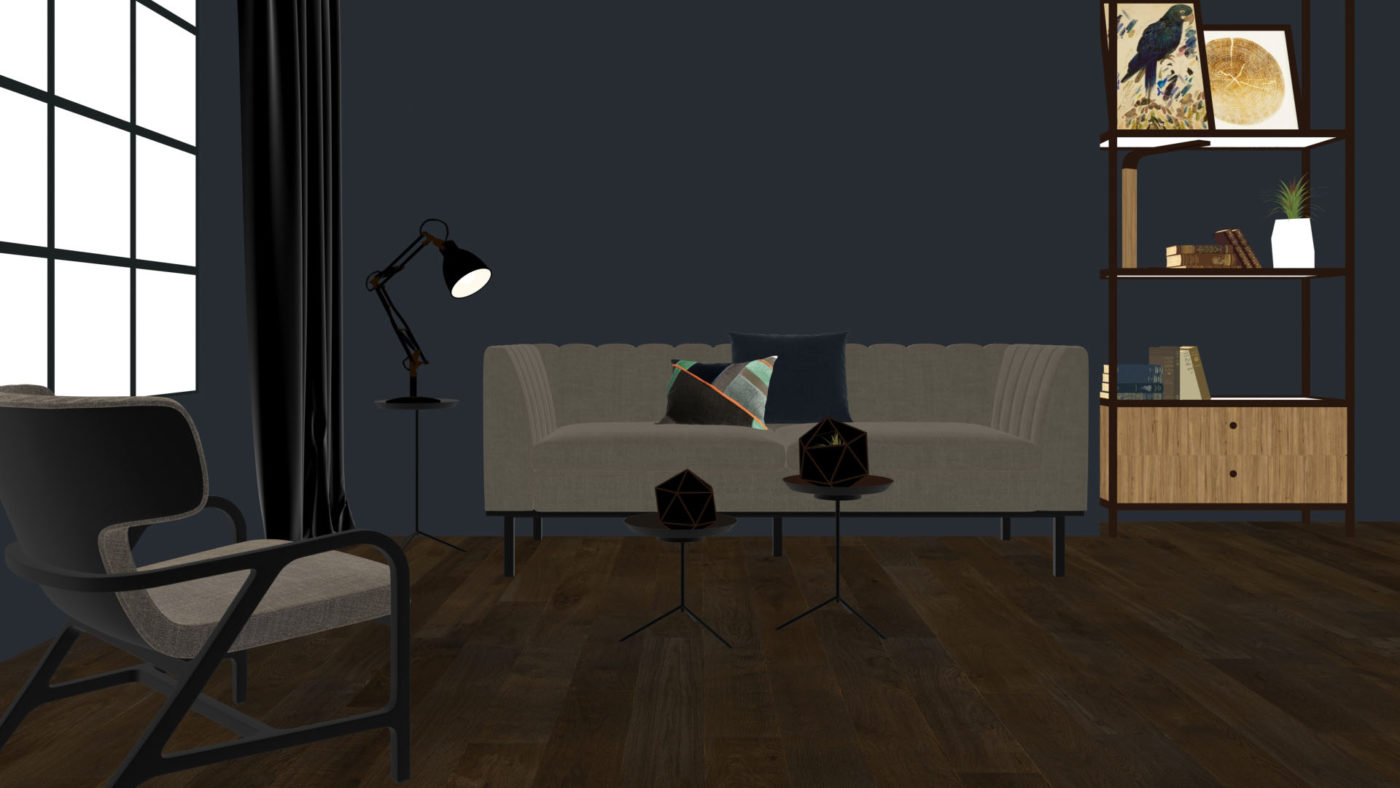
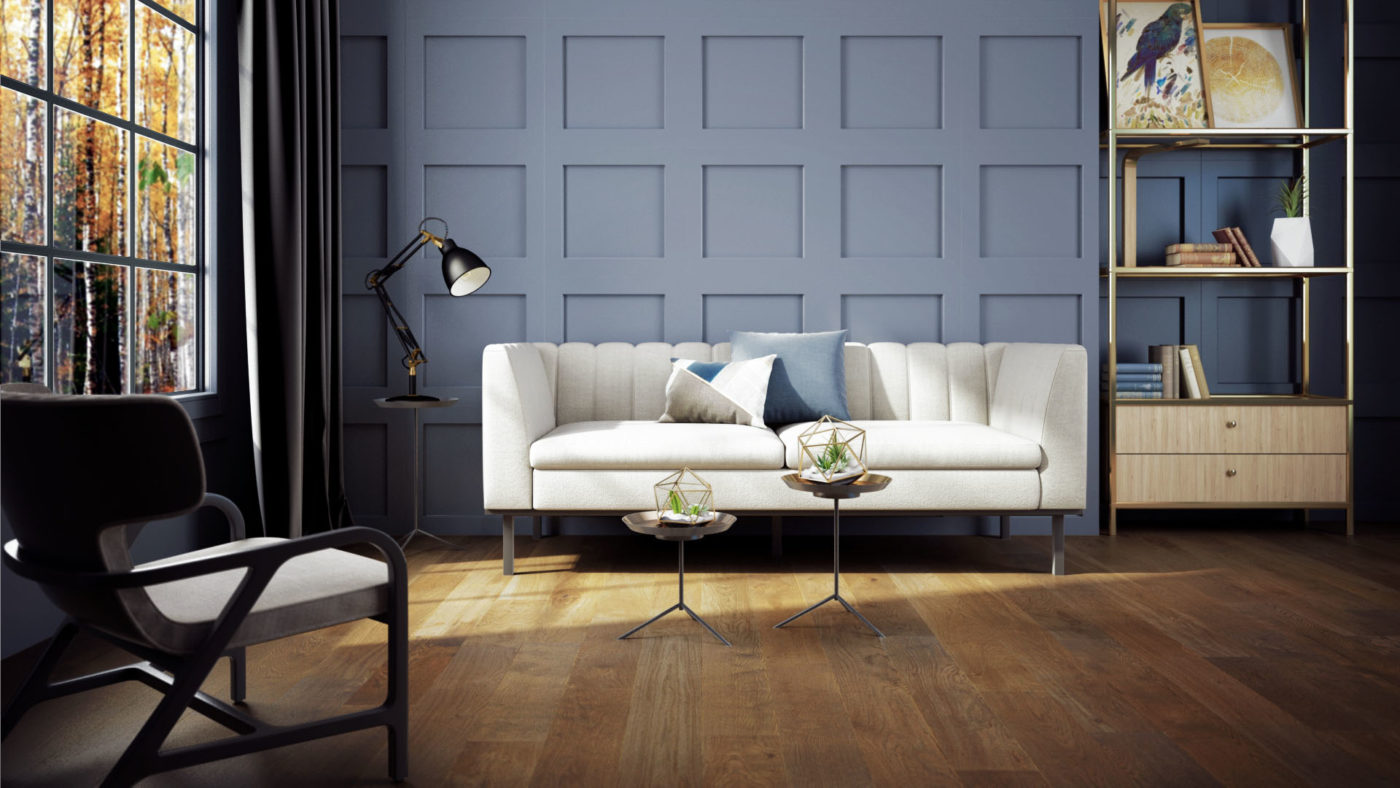
You might be wondering how we go from this… to this? Computer generated imaging is an art in itself! Let’s see what that entails, step by step. Follow the leader!
1. Defining the Style
The first thing we need to do is consider the overall concept, the design. We scout around, looking for visual information that captures our imagination.
Who is “we”? It is you and our 3D artists, working hand in hand.
Our aim is to come up with as much visual cues as possible. They allow us to visualize the expected rendering and to meet your aesthetic expectations. We then build a small library of reference images; sometime you provide them, sometimes we do. We also make sketches and a great moodboard. This last one brings together all of the items that should appear in the scene. Specialized designers can even be commissioned to create the moodboards when a product or ambiance is very specific. These elements make it possible to jointly agree on a guideline and a style of creation: traditional, contemporary, luxurious, vintage…
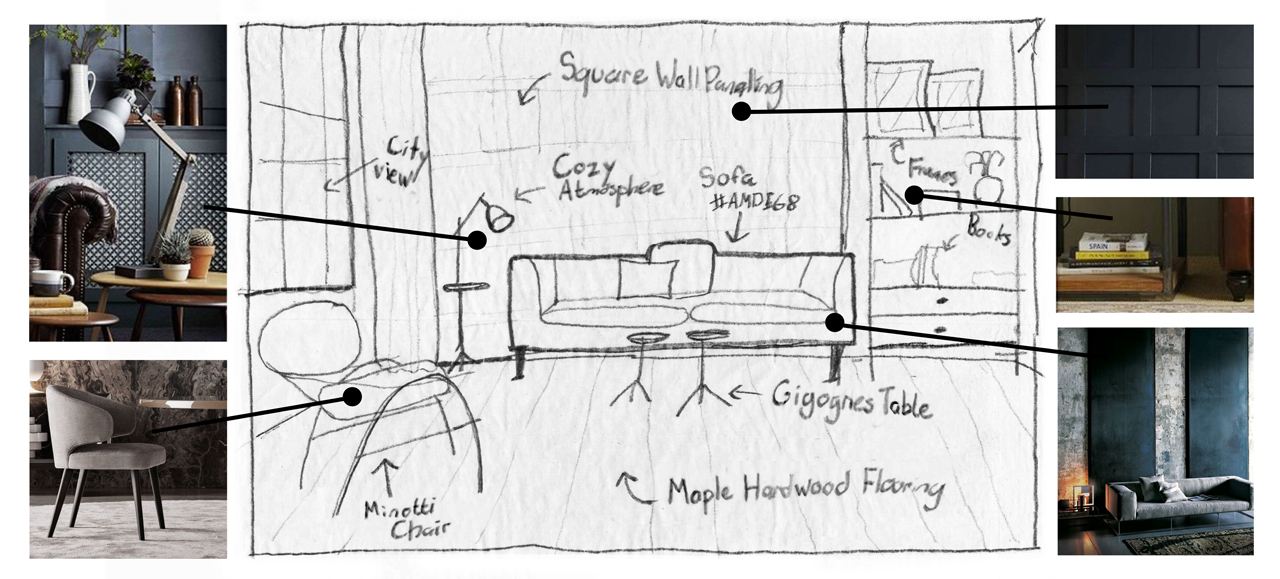
By the end of this step we should have a clear idea of the “distinctive stamp” we’ll be putting on our CG image.
2. Designing the 3D Scene
Once we’ve laid the groundwork for the overall concept, we can focus on designing our 3D scene.
Just picture it as a photo shoot set… but a virtual one.
This means designing the entire environment: walls, windows, doors and main furniture. (According to our artists, there is nothing more satisfying than creating something from scratch.)
The result looks something like this:
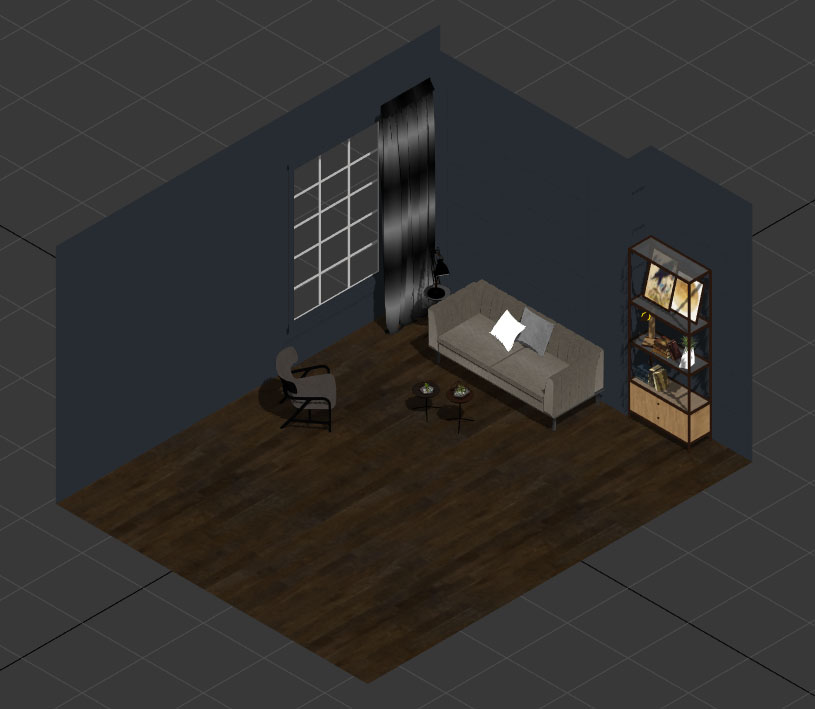
You’re probably thinking it’s not that great.
And you’re right. But don’t worry, we’ll get there.
3. Accessorizing
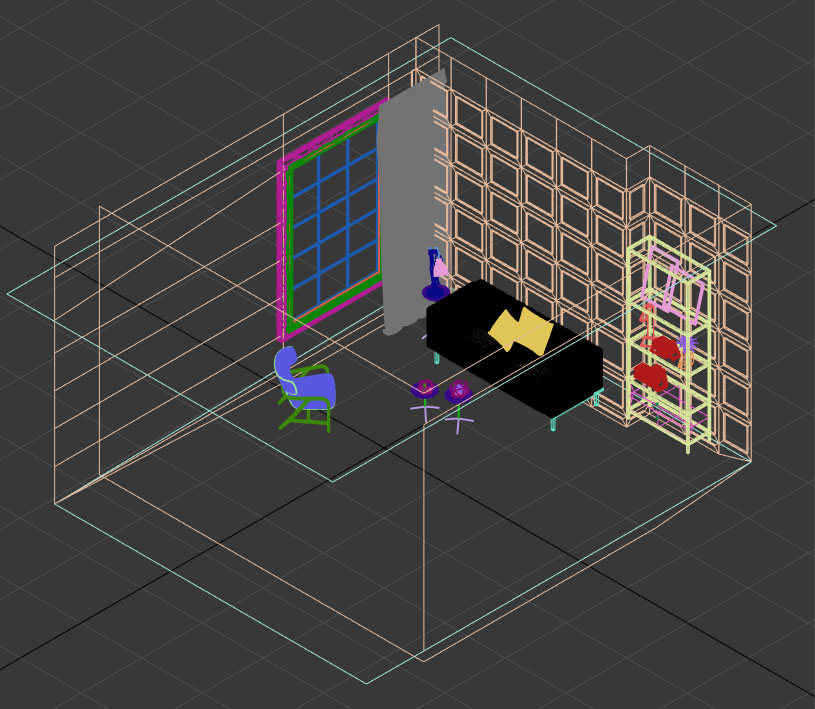
The time has come to add accessories to our environment and, more importantly, to position our star product, like with the sofa here:

You may already have the 3D model of your product. In this case, we import it into the new environment. If you don’t have it, we’ll model it for you based on 2D technical files. For accessories, we draw from our internal library. We select shapes and we add the material and the desired color so that they follow the guideline.
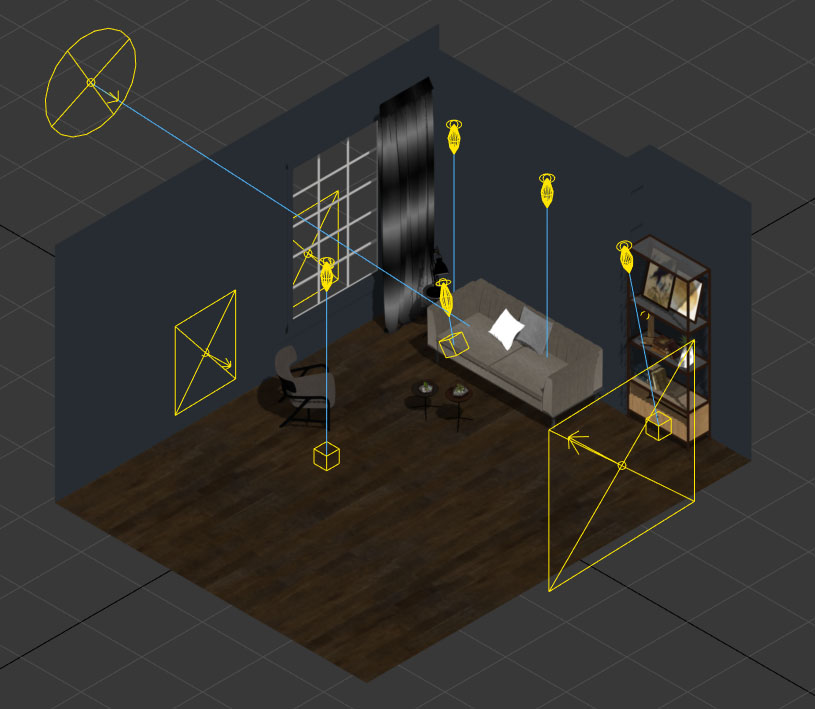
4. And Then There Was Light
If you were to ask us for the key ingredient for turning a CG image into a masterpiece of realism, we’d have to say: Light.
See for yourself! The same scene, first with sloppy lighting, then properly illuminated.
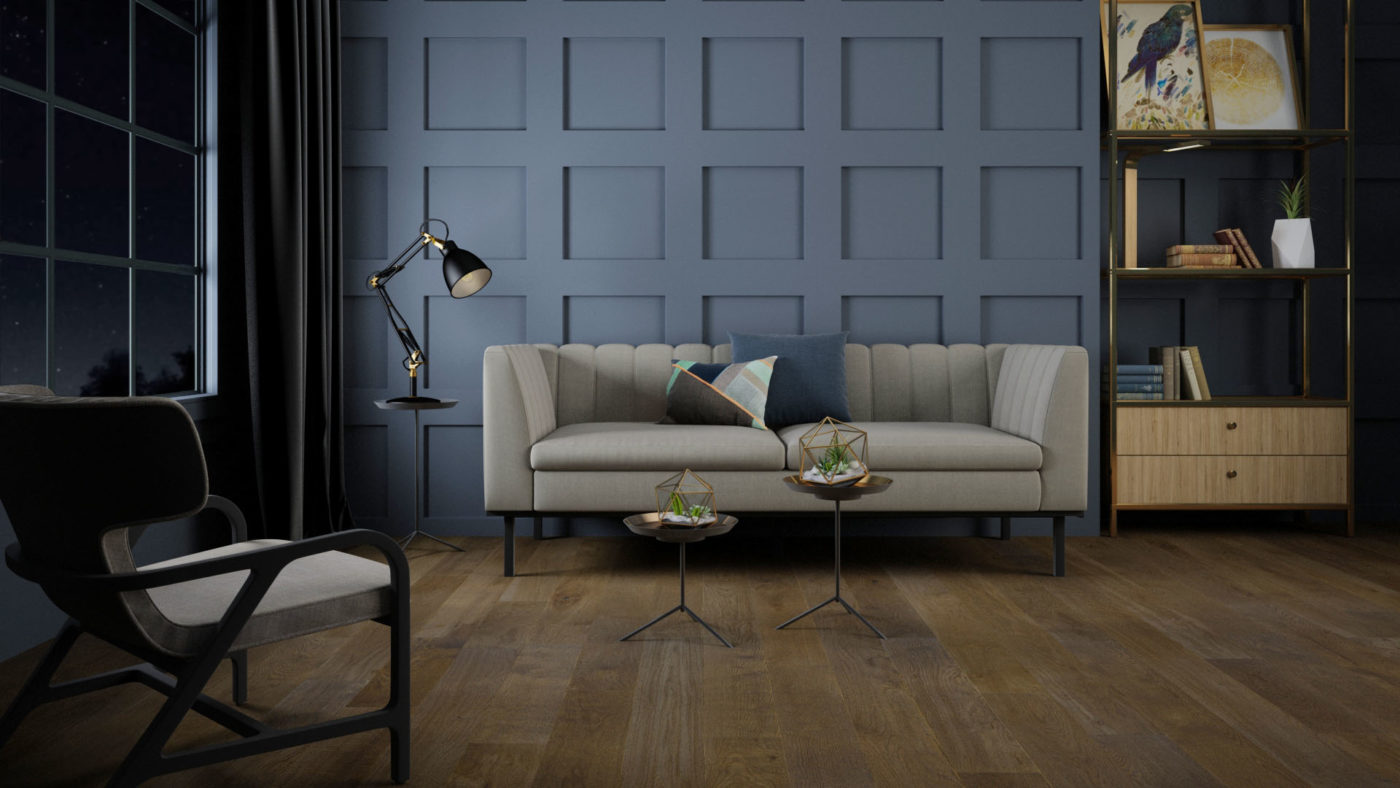
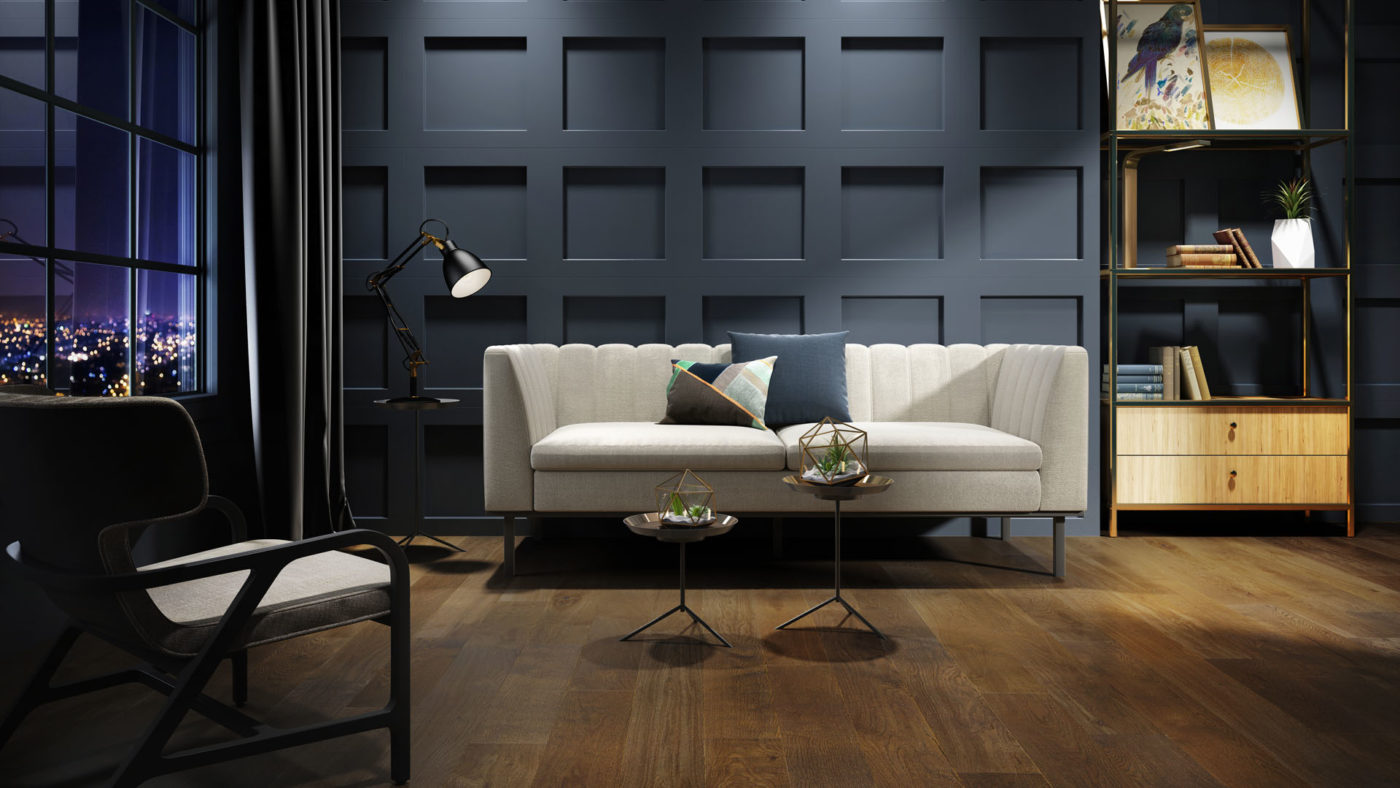
Stark contrast, right?
In our virtual studio, we position the basic light sources, namely the sun, the sky and the windows. 3D software offers lighting presets. However, this is not how we work at Kub Studio. As a former traditional photography studio, we have a wealth of knowledge about lighting. The secret of our photorealism is the combination of this expertise with 3D techniques.
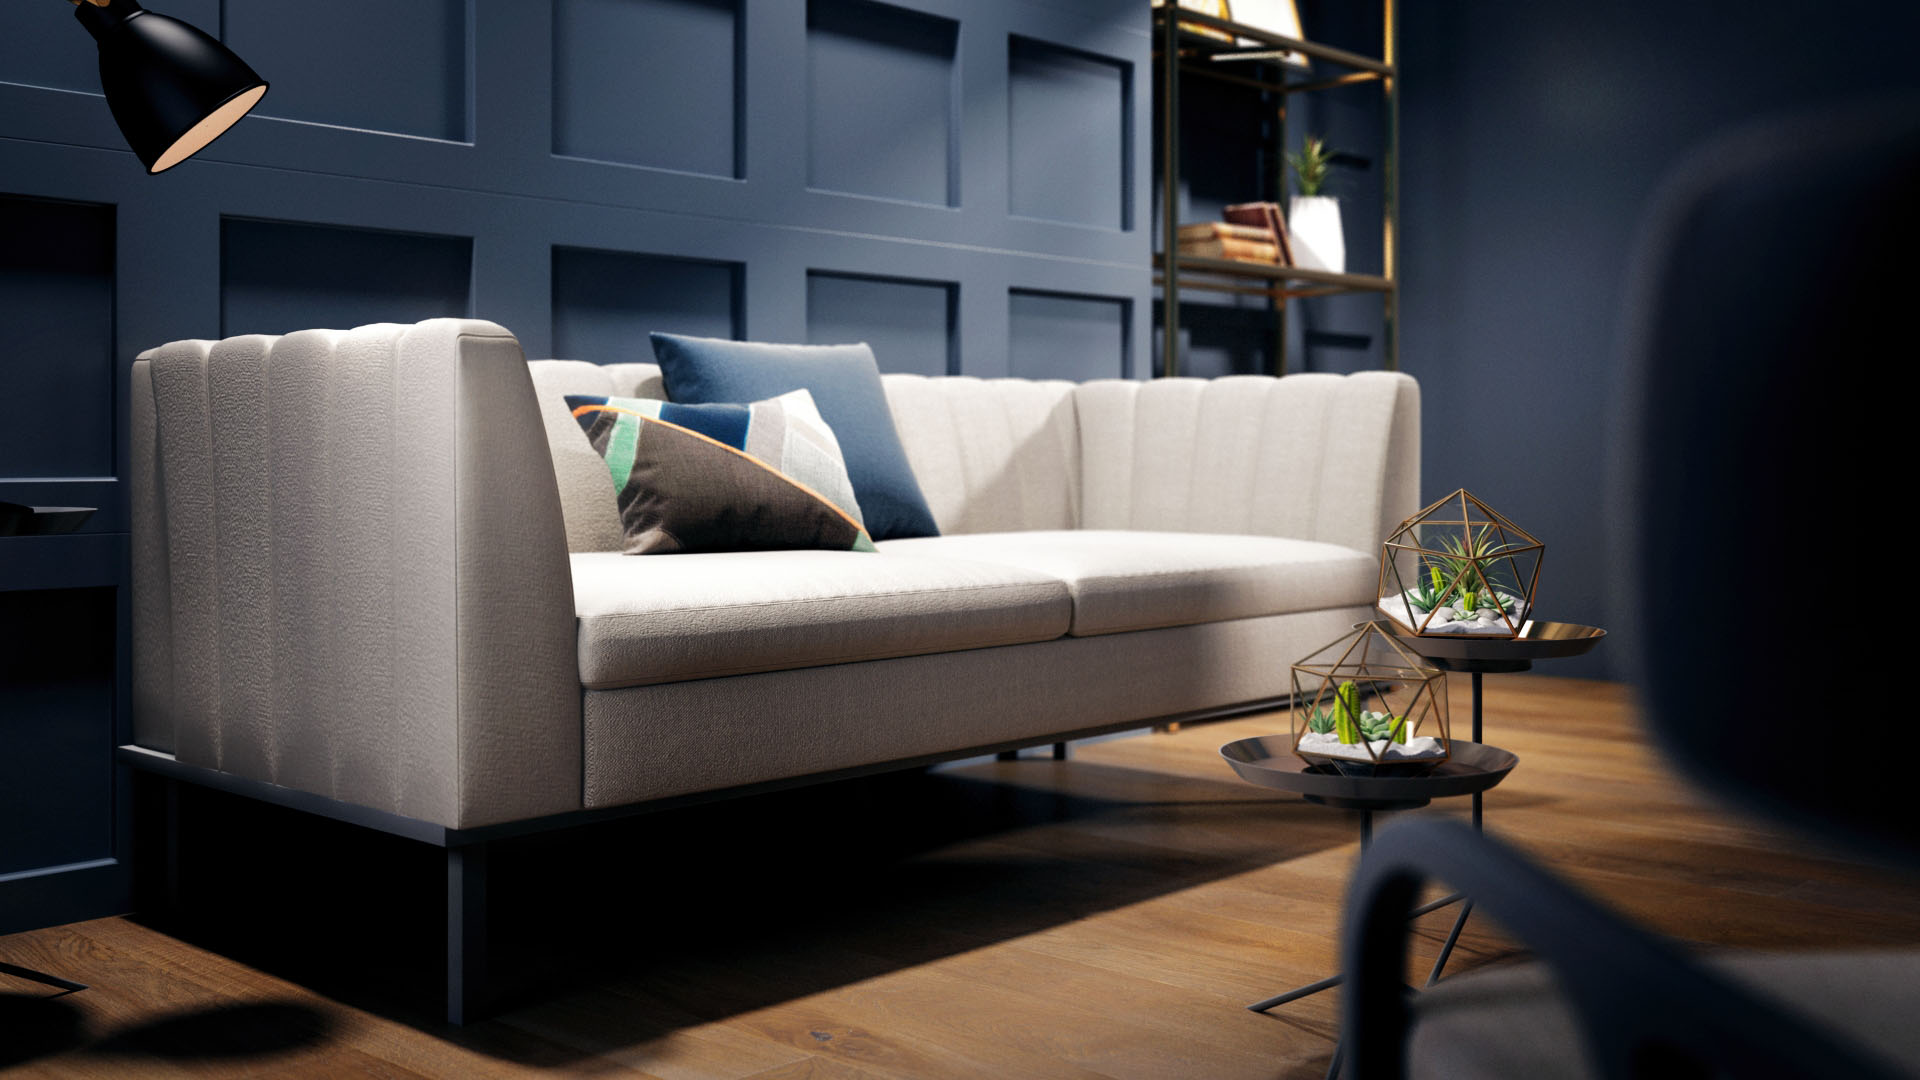
5. Texturing
The second miracle ingredient of a photorealistic CG image is the faithful rendering of textures.
Your scene may feature the best lighting, if it highlights unrealistic textures it loses all its appeal and realism. See the difference:
The purpose of 3D imagery is to promote your product, to present it in its best light. This is why you chose 3D: to present it as it is, without the inconveniences that the lens or screen sometimes brings. If the product shines from its unique composition (leather, chrome, hardwood, etc.), it must be seen. The reflections, the effects, nothing is left to chance.
This is another expertise that our photographic approach gives us. If you provide us with a physical sample, we will take photographs of it in the studio and then render it in 3D. This tested and approved technique ensures perfect conformity of your product: wood grain and knots, colours… It even allows creating close-ups of the texture, commonly called samples or swatches, to help guide your customers in the purchasing process.
6. Creating Atmosphere
We’ve all been to a party without atmosphere. The food is good, the guests are nice, but something is missing. We can’t quite put our finger on it, but we can feel it.
It’s that little je ne sais quoi that is added to the 3D environment at this stage. Secondary elements, but which make all the difference.
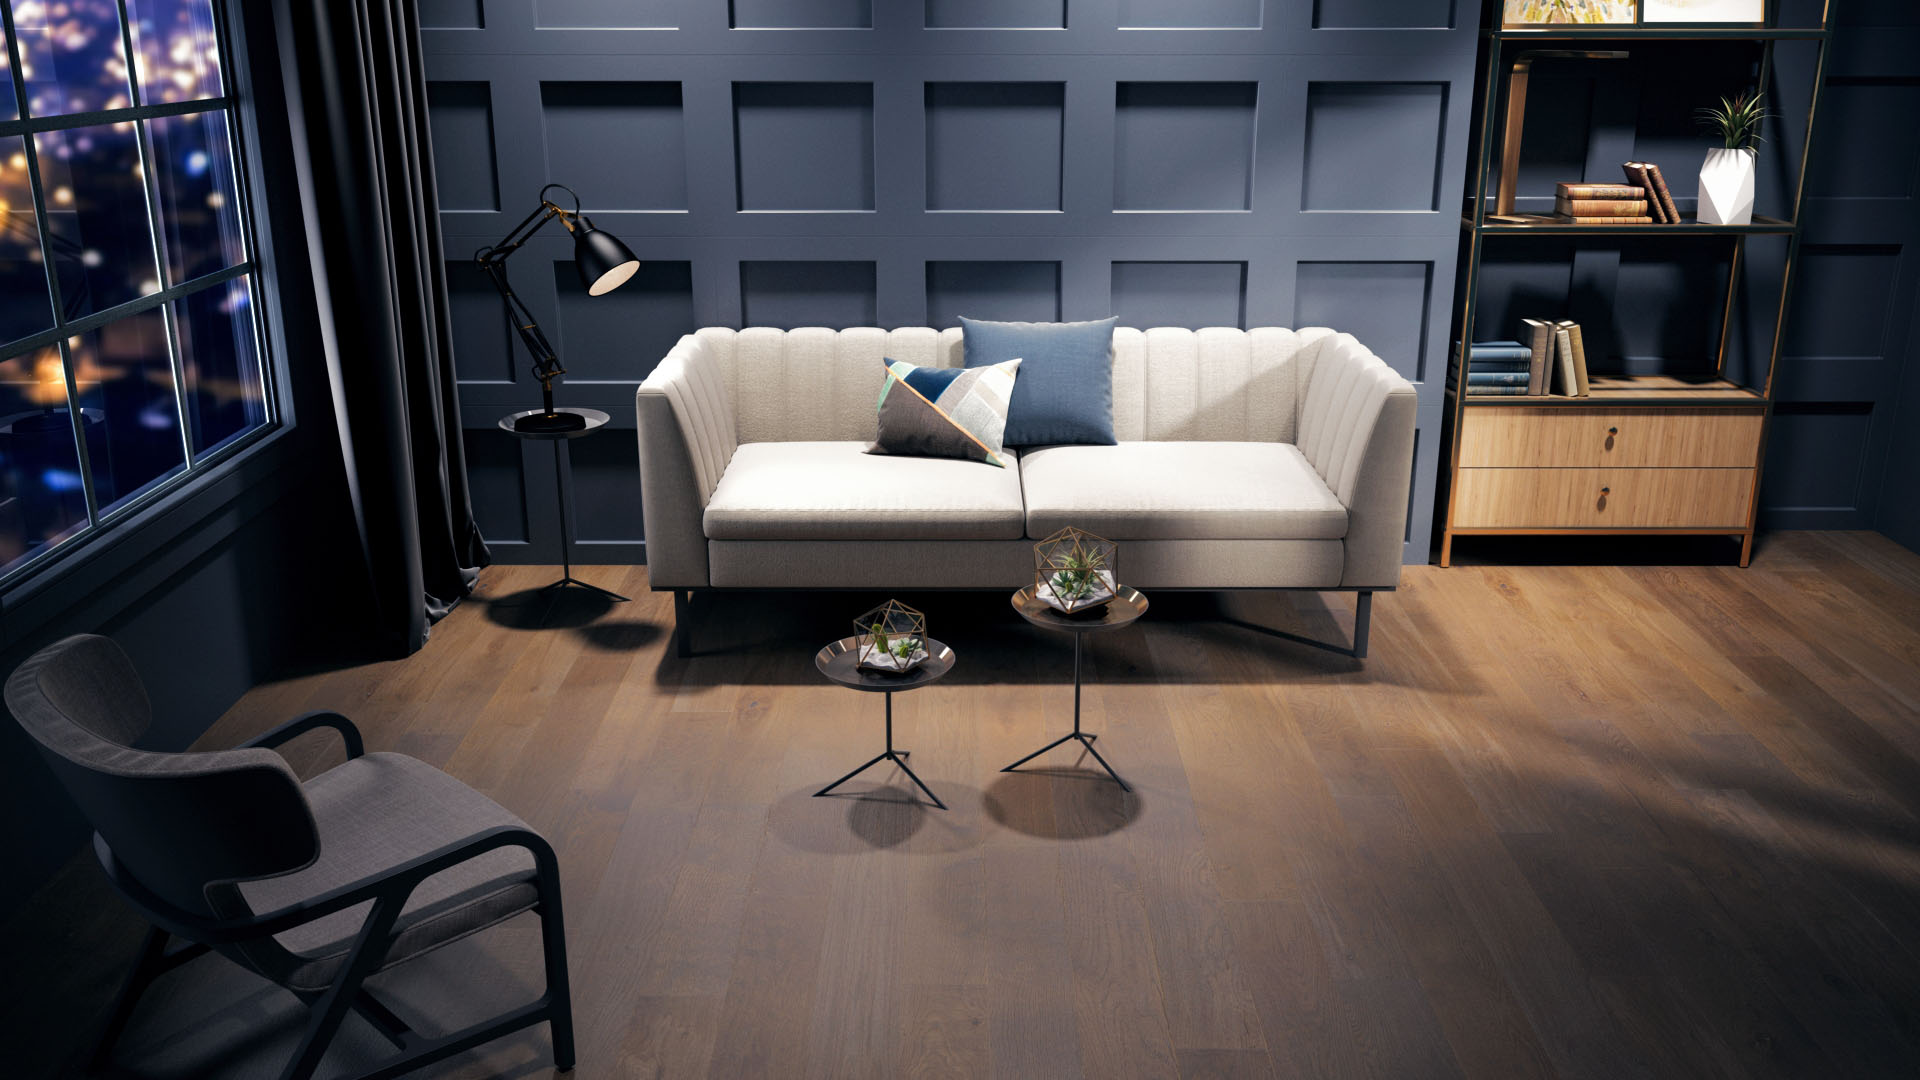
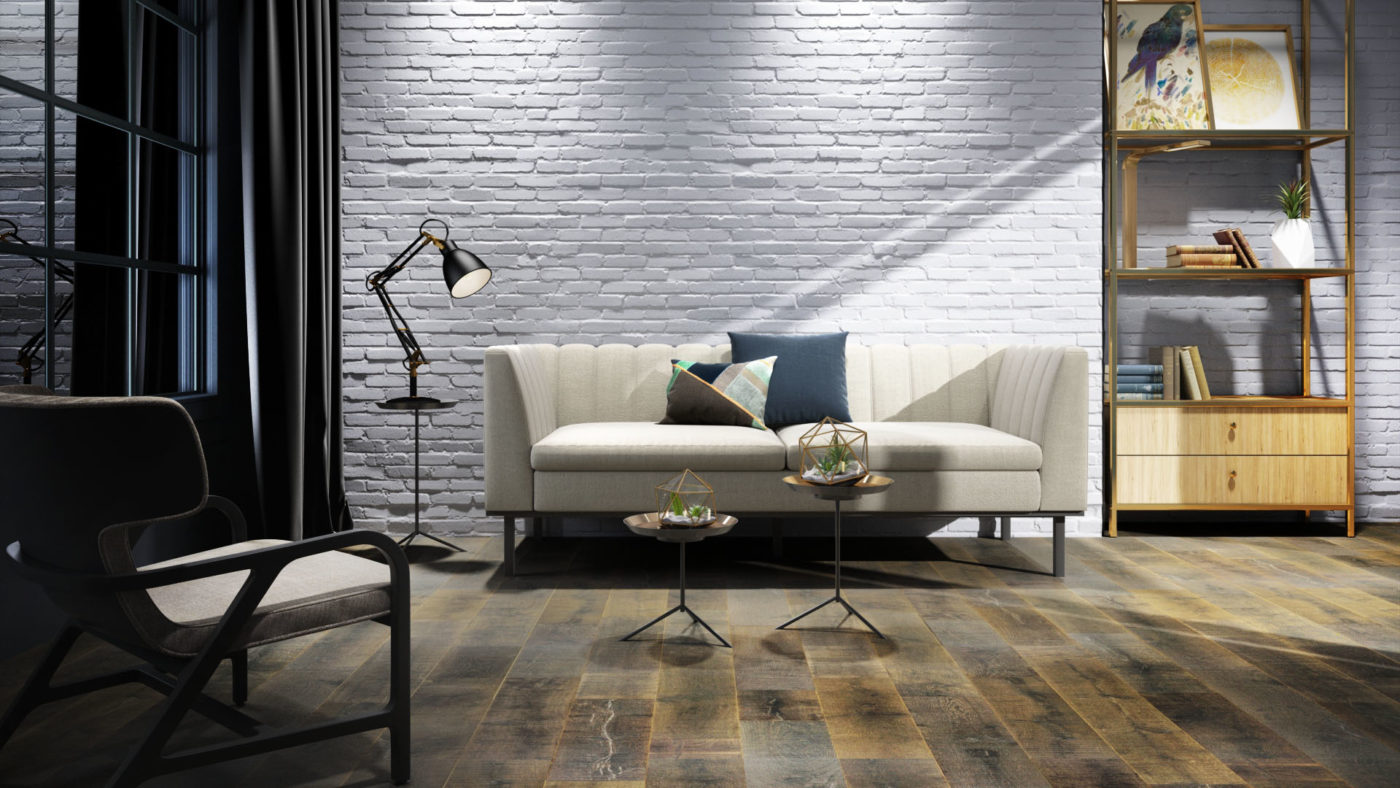
Is it daytime? Is it nightime? Are we in the city or in the forest? Is it summer, fall, winter?
The lighting is then adjusted; it is in a room that is contextualized and filled with objects that it takes on its full meaning. The shadows are different. If necessary, artificial light can be added. A lamp, for example.
7. Finding Perspective
Like a photographer chooses his point of view to take his photo, we choose our angle. The goal is to showcase the product for which the decor was created. The visual approach differs depending on whether it is a floor covering, a bathtub, an armchair or an accessory. It all comes down to the choice of angle.

The good news is that in 3D, we don’t create ONE image of a scene: we create the scene. We are therefore able to move inside it to see it from all angles. We can quickly and easily test multiple angles before capturing the image. It is possible to check which perspective optimizes the visual and technical aspects of the product. If a certain perspective doesn’t work, going back is simple. No need to wait for the photo studio to open up and to set the scene all over again. It is always available and ready.

8. Almost There
There are only a few details left! Now is the time to comb through the image and smooth out any rough edges in terms of materials, lighting and positioning.
Is an element floating in space? Is there an object that lacks texture? Our eagle eyes scrutinize the entire scene to make sure nothing has been overlooked.
And the beauty of it is that there is still time to change your mind.
As in the previous step, the scenery is still there. Just like in a real room, you can move around and move objects. We can therefore make last minute changes without starting over.
9. Validating
Is the image what you imagined? Are you happy with it? With all of it? Perfect!
Now is the time to polish it all up. We fine-tune our image by calibrating the colours, adjusting contrasts, etc. This is the final touch: the wax on a well-washed car, the last blush touches on a flawless makeup.
We finally let the image rest in our system to let it reach the highest possible definition.
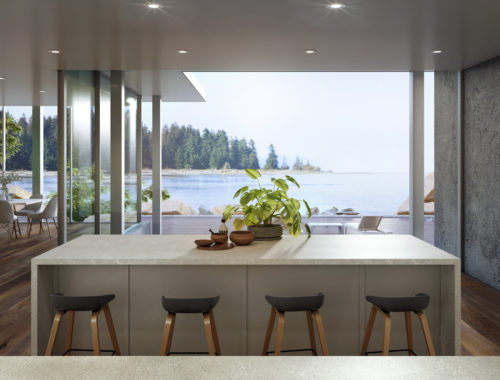
10. The Final Rendering
Voilà!
The image as you envisioned it. As our artists said, how satisfying to see your ideas come to life in every detail! It is thanks to your vision as well as their creativity and skills that we obtain a quality visual.

Depending on the time of year and the size of the project, this process takes about ten days to complete. Adding different shots and variations is then much shorter. With fluid communication, we achieve a fairly impressive speed / quality / price ratio.
Feel like switching to 3D modeling now?
Filed under: Making-of, Photorealism.
Read more
View all posts