Filed under: Uncategorized.
At Kub Studio, we like to believe we can read people’s minds, but our true supernatural power is in moodboards. We can be as creative and ingenious as you like, but it’s your imagination that we want to bring to life. A moodboard is like a small window into your mind. It’s an opportunity for you to put your vision down on paper and for us to immerse ourselves in it. It’s the starting point for a solid project that will take precisely the direction you have in mind.
What Is a Moodboard?
A moodboard is a collage of images, text and any other elements needed to illustrate your idea. It’s the most important source of inspiration for 3D artists. Just as a construction contractor relies on the plans of a house, a 3D artist or technician will use a moodboard as the basis for building your image.
This inspiration board contains everything you want to include in the image. From the floors to the colour of the walls, from the furniture to the decorative features. It shows exactly where and how you want to showcase your product. It can even convey the desired camera angle and lighting. But what about the things that can’t be illustrated, such as the height of the ceiling? They’re set out in the comments.
This creative tool is the commencement of any project. We ask that you design it even before we draft a quote for you. Thanks to this detailed description, it’s easy to evaluate the time and resources required to fulfil your request. The more explicit the moodboard, the more precise the proposal.
While a picture is worth a thousand words, a moodboard is the rough draft of the story you want your 3D image to tell.
Moodboard vs. Inspirational Image
There’s a difference between a moodboard and an image that inspires us.
A moodboard is very detailed. It depicts exactly what you want the computer-generated image to contain. In concrete terms, it’s an orderly arrangement of several images.
An inspirational image is a single image that will give a general idea of the desired atmosphere.

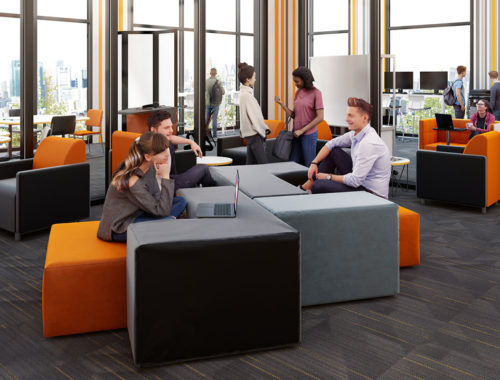
This billiards room could easily be used as inspiration. You can imagine a hushed ambiance, with a slightly old-fashioned yet still very elegant feeling about it. It reflects a taste for dark colours and comfortable furnishings. It’s the moodboard, however, that will determine how this atmosphere will take shape for you.
Let’s say it really is a billiards room you want to create. This inspirational image conveys the mood of a billiards room whereas a moodboard will depict your billiards room.
How Do You Create a Moodboard?
Before you start, you have to ask yourself a few questions. What emotion will my product evoke in the user? Which style will best convey that emotion? Modern, Nordic, coastal? These questions will allow you to establish a background for your image. A simple search on Pinterest or Houzz, or even in our own portfolio will help you answer them.
Once that’s done, you need to look for the elements that will create your chosen style, that is to say the objects that will make up the image. Take note: if the images are two dimensional, we will need to render them in 3D. The 3D rendering time adds to the project, and therefore to the final bill. That’s why, at this stage, we suggest you use 3D stock image banks, such as 3dsky. These platforms are supplied by and for 3D artists. If you integrate their items with their URL into your moodboard, we’ll be able to find them and incorporate them into your image. It’s a less expensive but equally effective and adaptable solution.
Of course, when it comes to your product, we want the original! This one we’ll render and create from A to Z, with all of its characteristics. This is the very core of the project, and this is where our expertise lies. We’ll do the same if you’ve envisioned very specific accessories that you’re unable to find in the image banks. This process however will be the subject of an entirely different discussion! Today, let’s focus on the subject at hand, the preliminary stage that is the moodboard.
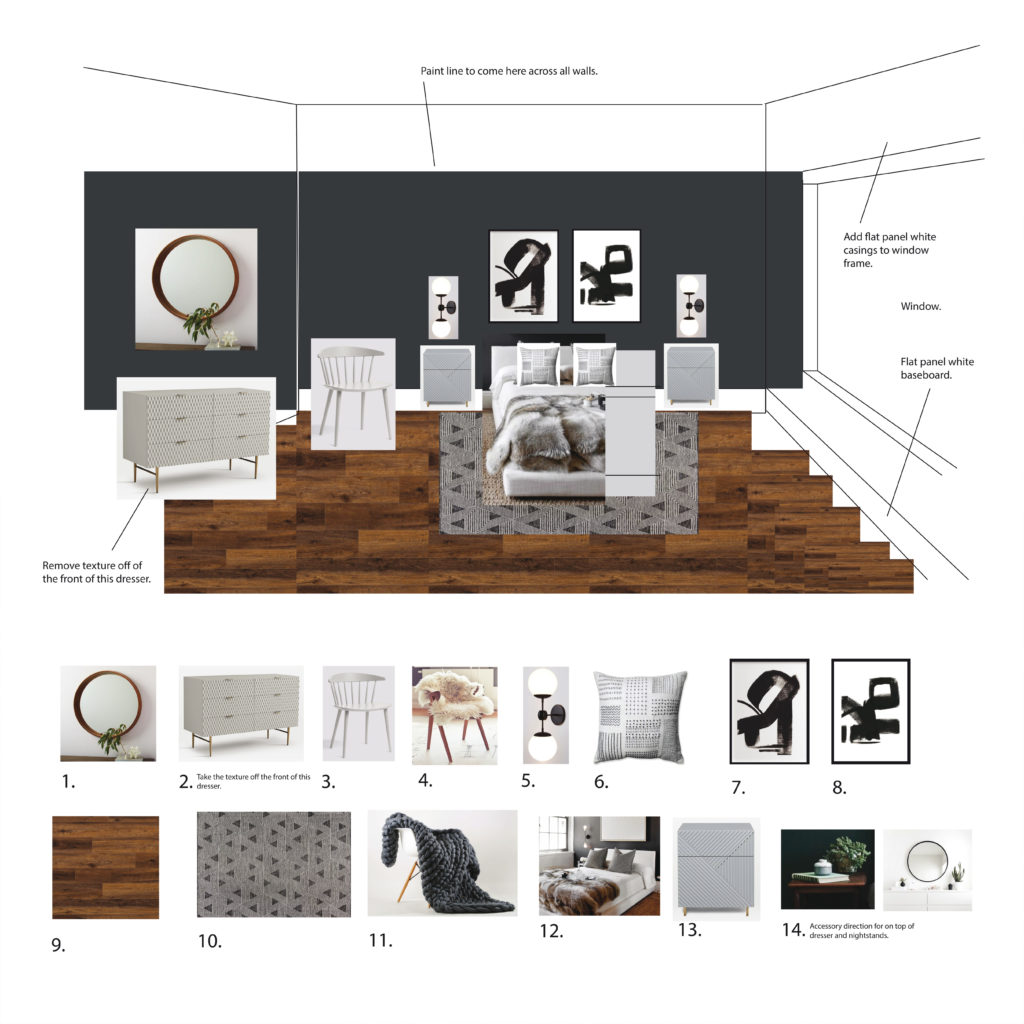
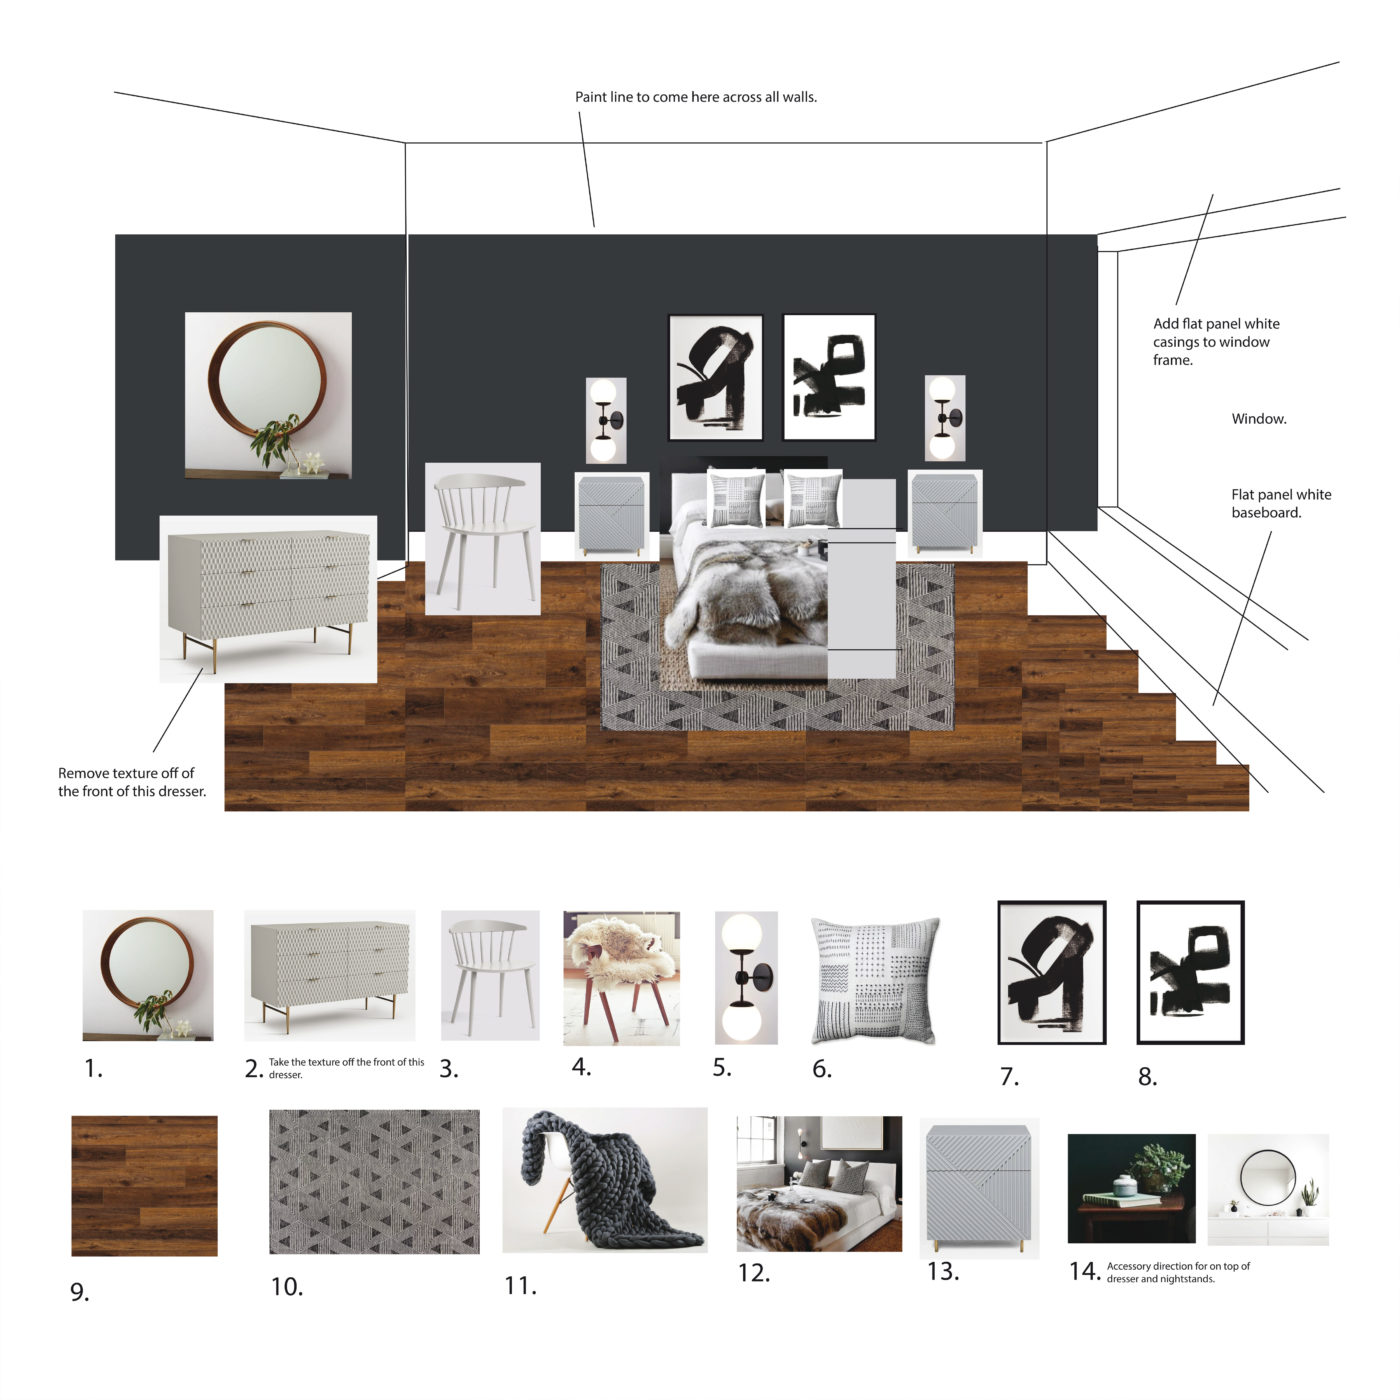
To complete this stage, you’ll need to write about anything that can’t be illustrated. Take for example the moodboard above for Evoke flooring by Metropolitan. How would you go about making a collage of the mouldings around the window? It’s better to write it down. This also applies to the angle from which you want the accessories on the dresser to be seen. In short, the details, dimensions and particularities that can’t be illustrated but are to be included in the image are added in the comments.
The Key Elements of a Successful Moodboard
An effective moodboard fulfills two somewhat opposing requirements: it is comprehensive yet also simple.
On the one hand, it’s comprehensive in that it contains everything the artists needs to know. The furniture, accessories, atmosphere features… Elements left at the discretion of the 3D expert are specified as such. The 3D designer therefore won’t have any queries and will be ready to get to work.
On the other hand, it’s simple in that it contains only the relevant information. It is clear, accurate and concise. A moodboard must be used as a tool. If it’s three pages long, it’s no help to anyone. It won’t fulfill its function either if it’s drawn in pencil in two minutes on the corner of a table. The information must be presented clearly and in layman’s terms so that everyone can understand it.
The Traps to Avoid
At the risk of repeating ourselves, a moodboard is specific. As such, if it shows a view from above, that’s the angle we’ll use to create the image. If that’s not the camera angle you want, you’ll need to adjust it or point it out in the comments.
It’s also important to avoid contradictions. For example, if someone requests a hushed ambiance but the moodboard is awash with neon colours… Or, if we’re asked for a minimalist decor but the inspiration board is overly cluttered… We’ll discuss certain style aspects together before we start.
How Do We Use the Moodboard?
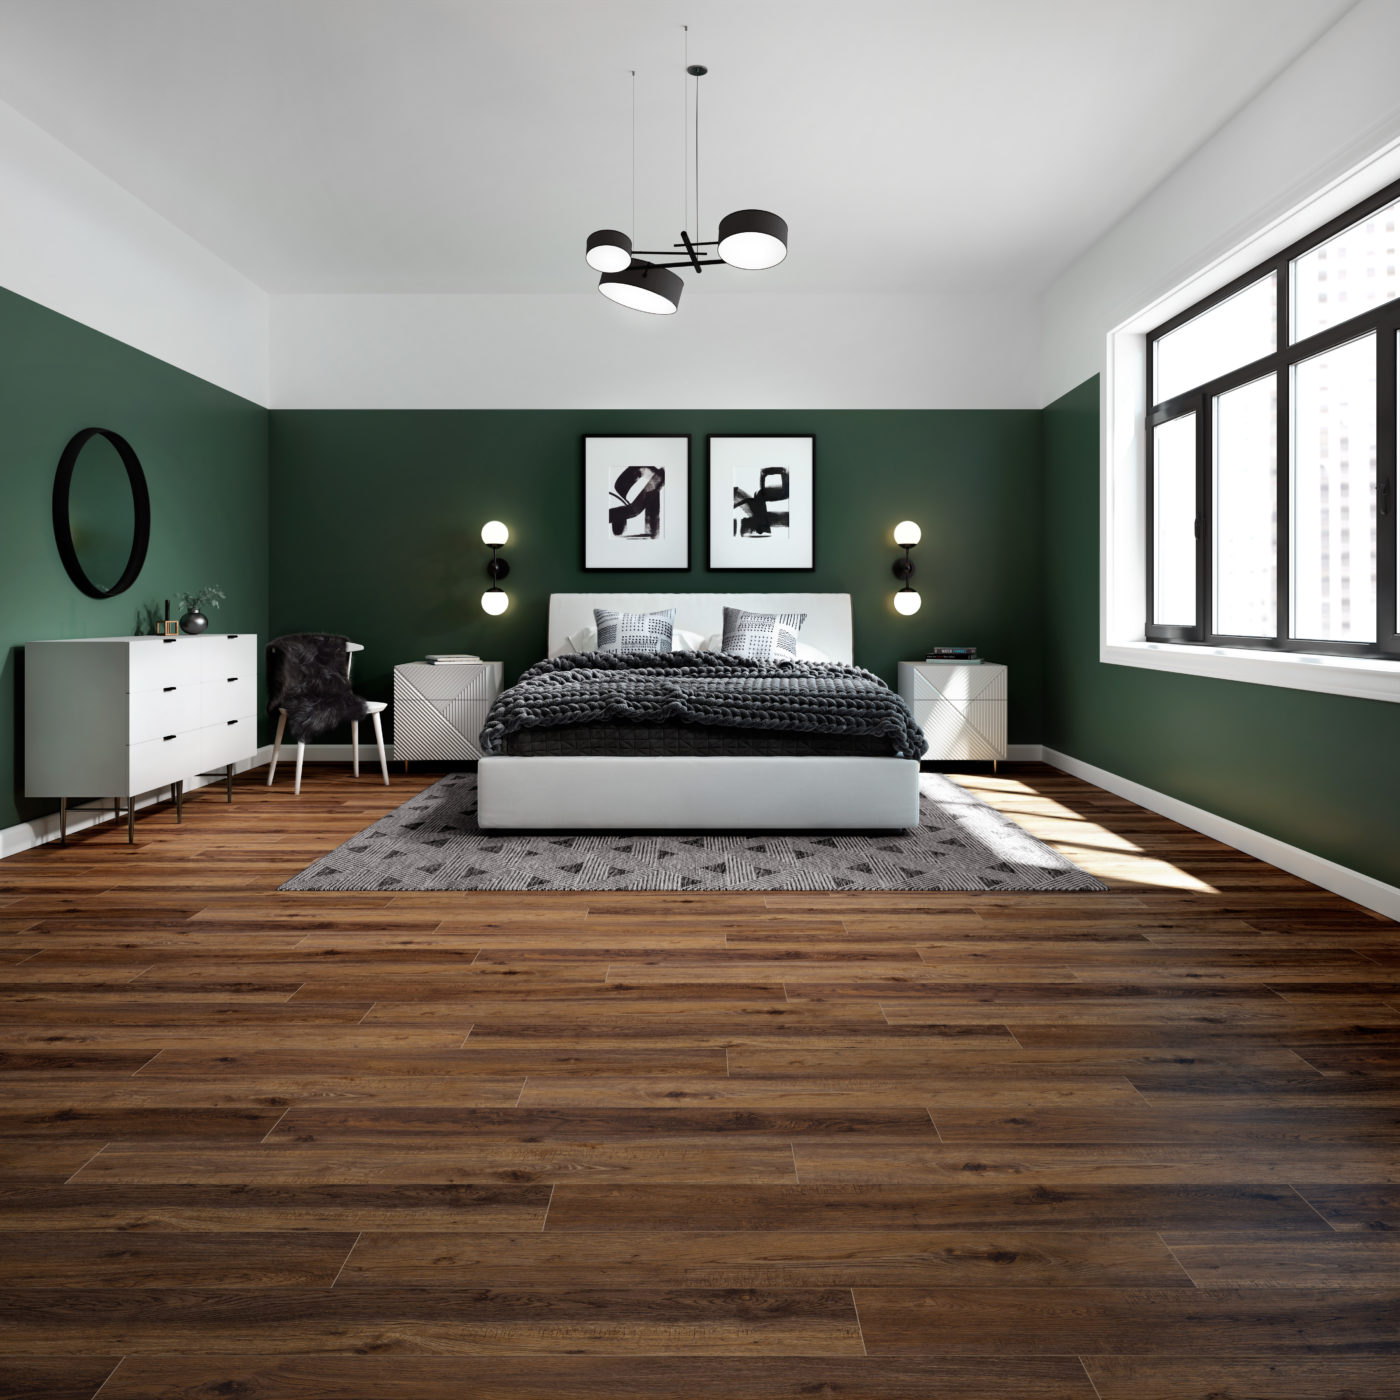
A moodboard is the vision you have in your head, but in an “arts and crafts” format. The studio’s task is to produce this idea in a photorealistic render.
The degree of similarity between your version and ours all depends on the moodboard’s level of precision. If it’s meticulously specific, we’ll virtually be able to imitate it down to the smallest details. However, if it’s somewhat vague, we’ll have to be more creative, more inventive. If that’s the case, the customer will have to trust us, and we do of course enjoy rising to such challenges!
Does there come a time in the customer relationship when we stop using moodboards? No. We always use them, even with our regular customers. The strength of our shared projects lies in the combination of a client’s idea and our creativity. We get to know our customers well, and their tastes and style. But regardless of how well we know each other, you will always be the expert when it comes to your product. It is your imagination, your strategy that we want to bring to life. Over time, putting together a moodboard will become much easier. We become familiar with the preferences of each customer, we know which questions to ask and what suggestions to make. Each and every image however will still be unique, with its own specific requirements.
But What if the Project Isn’t a Room Scene?
What if your project isn’t a room or a landscape? What if it doesn’t feature accessories? What if, for example, it’s simply your product on a white background? Do we still use a moodboard? Yes… and no.
We can use one. It can serve to specify things such as colours, perspective, lighting and dimensions. Think of Apple, which always presents its merchandise from the same angle and in the same size.
We can however call upon the spreadsheet. Presented as a list, it contains the model number, the desired angle and finish, and can sometimes even include a reference image. The project manager will be able to determine whether or not your project requires a moodboard.
The Storyboard
A more technical relative of the moodboard, a storyboard is the equivalent tool for designing a 3D animation video.
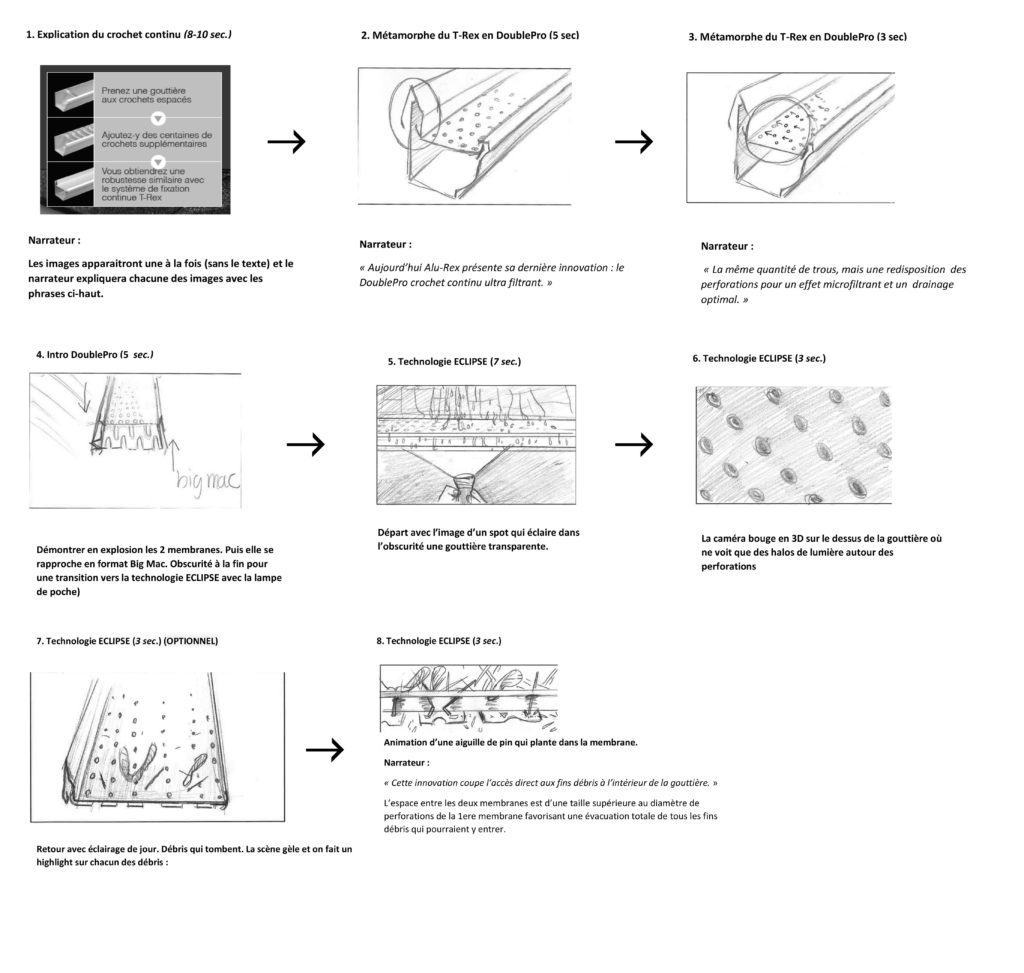
A storyboard is an illustrated scenario, one shot at a time. It can sometimes resemble a moodboard when used to describe an atmosphere, the decor, the camera angle or the lighting. Its content however is much more similar to sketches, drawings and descriptions of what we see. It describes the action, length, narration and sometimes contains text that is to be included in the image. Like this one from Alu-Rex, it looks like a comic strip detailing the content of the video.
For technical animations, we need the plans for the device that we’ll be animating more than a storyboard. We’ll want to know its components, dimensions, assembly, angles and movements. A jet of water in a given place with an angle of X degrees will have a very specific appearance and strength. It’s the technical drawings that will allow us to faithfully reproduce this type of device.
What About All Those Out There Who Aren’t Artistic?
Admittedly, not everyone has the skills needed to create a moodboard. Sometimes, because of a hectic schedule, some people just don’t have the time. Fear not! Our Kubists are there to help. They will however need a broad outline.
They’ll want to know what style you’re looking for, and then they’ll ask you to look for images that you like. (And, because you’ve read this article, you’ll know exactly what they mean by inspirational images! Ha ha!) They’ll use those images to put together a moodboard that they’ll ask you to validate, and then we’re ready to go.
Otherwise, when the desired image is extremely specific or the atmosphere is very explicit, it may be more advisable to call on the services of a designer.
As Einstein said: “If you can’t explain it simply, you don’t understand it well enough.” A moodboard is the simplest form for expressing your thoughts. The creative process will allow you to visit or revisit your product range. It will allow us, in turn, to better understand who you are, what you do and what you wish to convey. It’s then time for us to take over and start the technical rendering work.
Filed under: Uncategorized.
Read more
View all posts